GameEngine Logistics and Submission Guide
The bridge from GameBuilder to code management and assessment success. Learn the workflow for managing files, tracking progress, and submitting your work.
Overview
You’ve spent 12 weeks learning the tools—now it’s time to use them like a pro. Here’s your toolkit refresher:
Your GitHub Workflow:
- Projects → Track team progress (Kanban boards)
- Issues → Break down tasks and stay organized
- Version Control → Never lose your work (commit often!)
- Forks & PRs → Collaborate safely and get code reviewed
- VSCode → Build and test locally before pushing
Your responsibility: Keep your team in sync. Update your issues, commit with clear messages, and test before you share. Good habits now = smooth projects later.
Your GameEngine Workspace
Step 0: Set Up Your Team Repo
Before anything else, one team member creates the GitHub repo, then:
- Add Collaborators → Settings → Collaborators → Invite your team (they need write access)
- Enable Issues & Projects → Settings → Features → Check both boxes
- Each person clones →
git clone <repo-url>in Terminal - Open in VSCode →
code <repo-folder>be sure to source your venv
Critical: Everyone must have the repo open in VSCode with collaborator access. No access = can’t contribute = can’t get credit.
Key folders you’ll use:
After cloning your repo, here’s where you’ll be working:
/assets/js/GameEnginev1
├── builder/
│   └── GameBuilder.md ← Your visual game creator
├── essentials/ ← Core game objects you'll use immediately:
│   ├── GameEnvBackground.js
│   ├── Player.js
│   ├── Npc.js
│   └── Barrier.js
├── GameLevelCustom.js ← Your game (imports from essentials/)
└── GameLevelDesert.js, etc. ← Example levels to study

/images/gamebuilder
├── bg/ ← Your background images
└── sprites/ ← Your character/NPC images
The workflow from GameBuilder to Assessment:
- Add images → Drop files in
/images/gamebuilder/bgand/sprites - Use GameBuilder → Configure your game visually (this is your authoring space)
- GameBuilder generates code → Creates
GameLevelCustom.jswith imports fromessentials/ - Test locally →
make devthen save and test to see it works - Commit & push → Share with your team
- Document in Issues → Track progress for Formative assessments
Connect to essentials/: Open those 4 files (Background, Player, NPC, Barrier) to understand how game objects work. Your GameLevel imports them automatically!
Team Coordination & Planning
Real talk: This is the part students skip—and then panic at the deadline. Don’t be that team.
Think of it like a raid in a game: you need a strategy, role assignments, and checkpoints. No plan = chaos = low grade. Here’s your defense:
Kanban Board (Your team’s mission control)
- See who’s doing what, right now
- Move cards from “To Do” → “In Progress” → “Done”
- No surprises at submission time
Example Kanban:
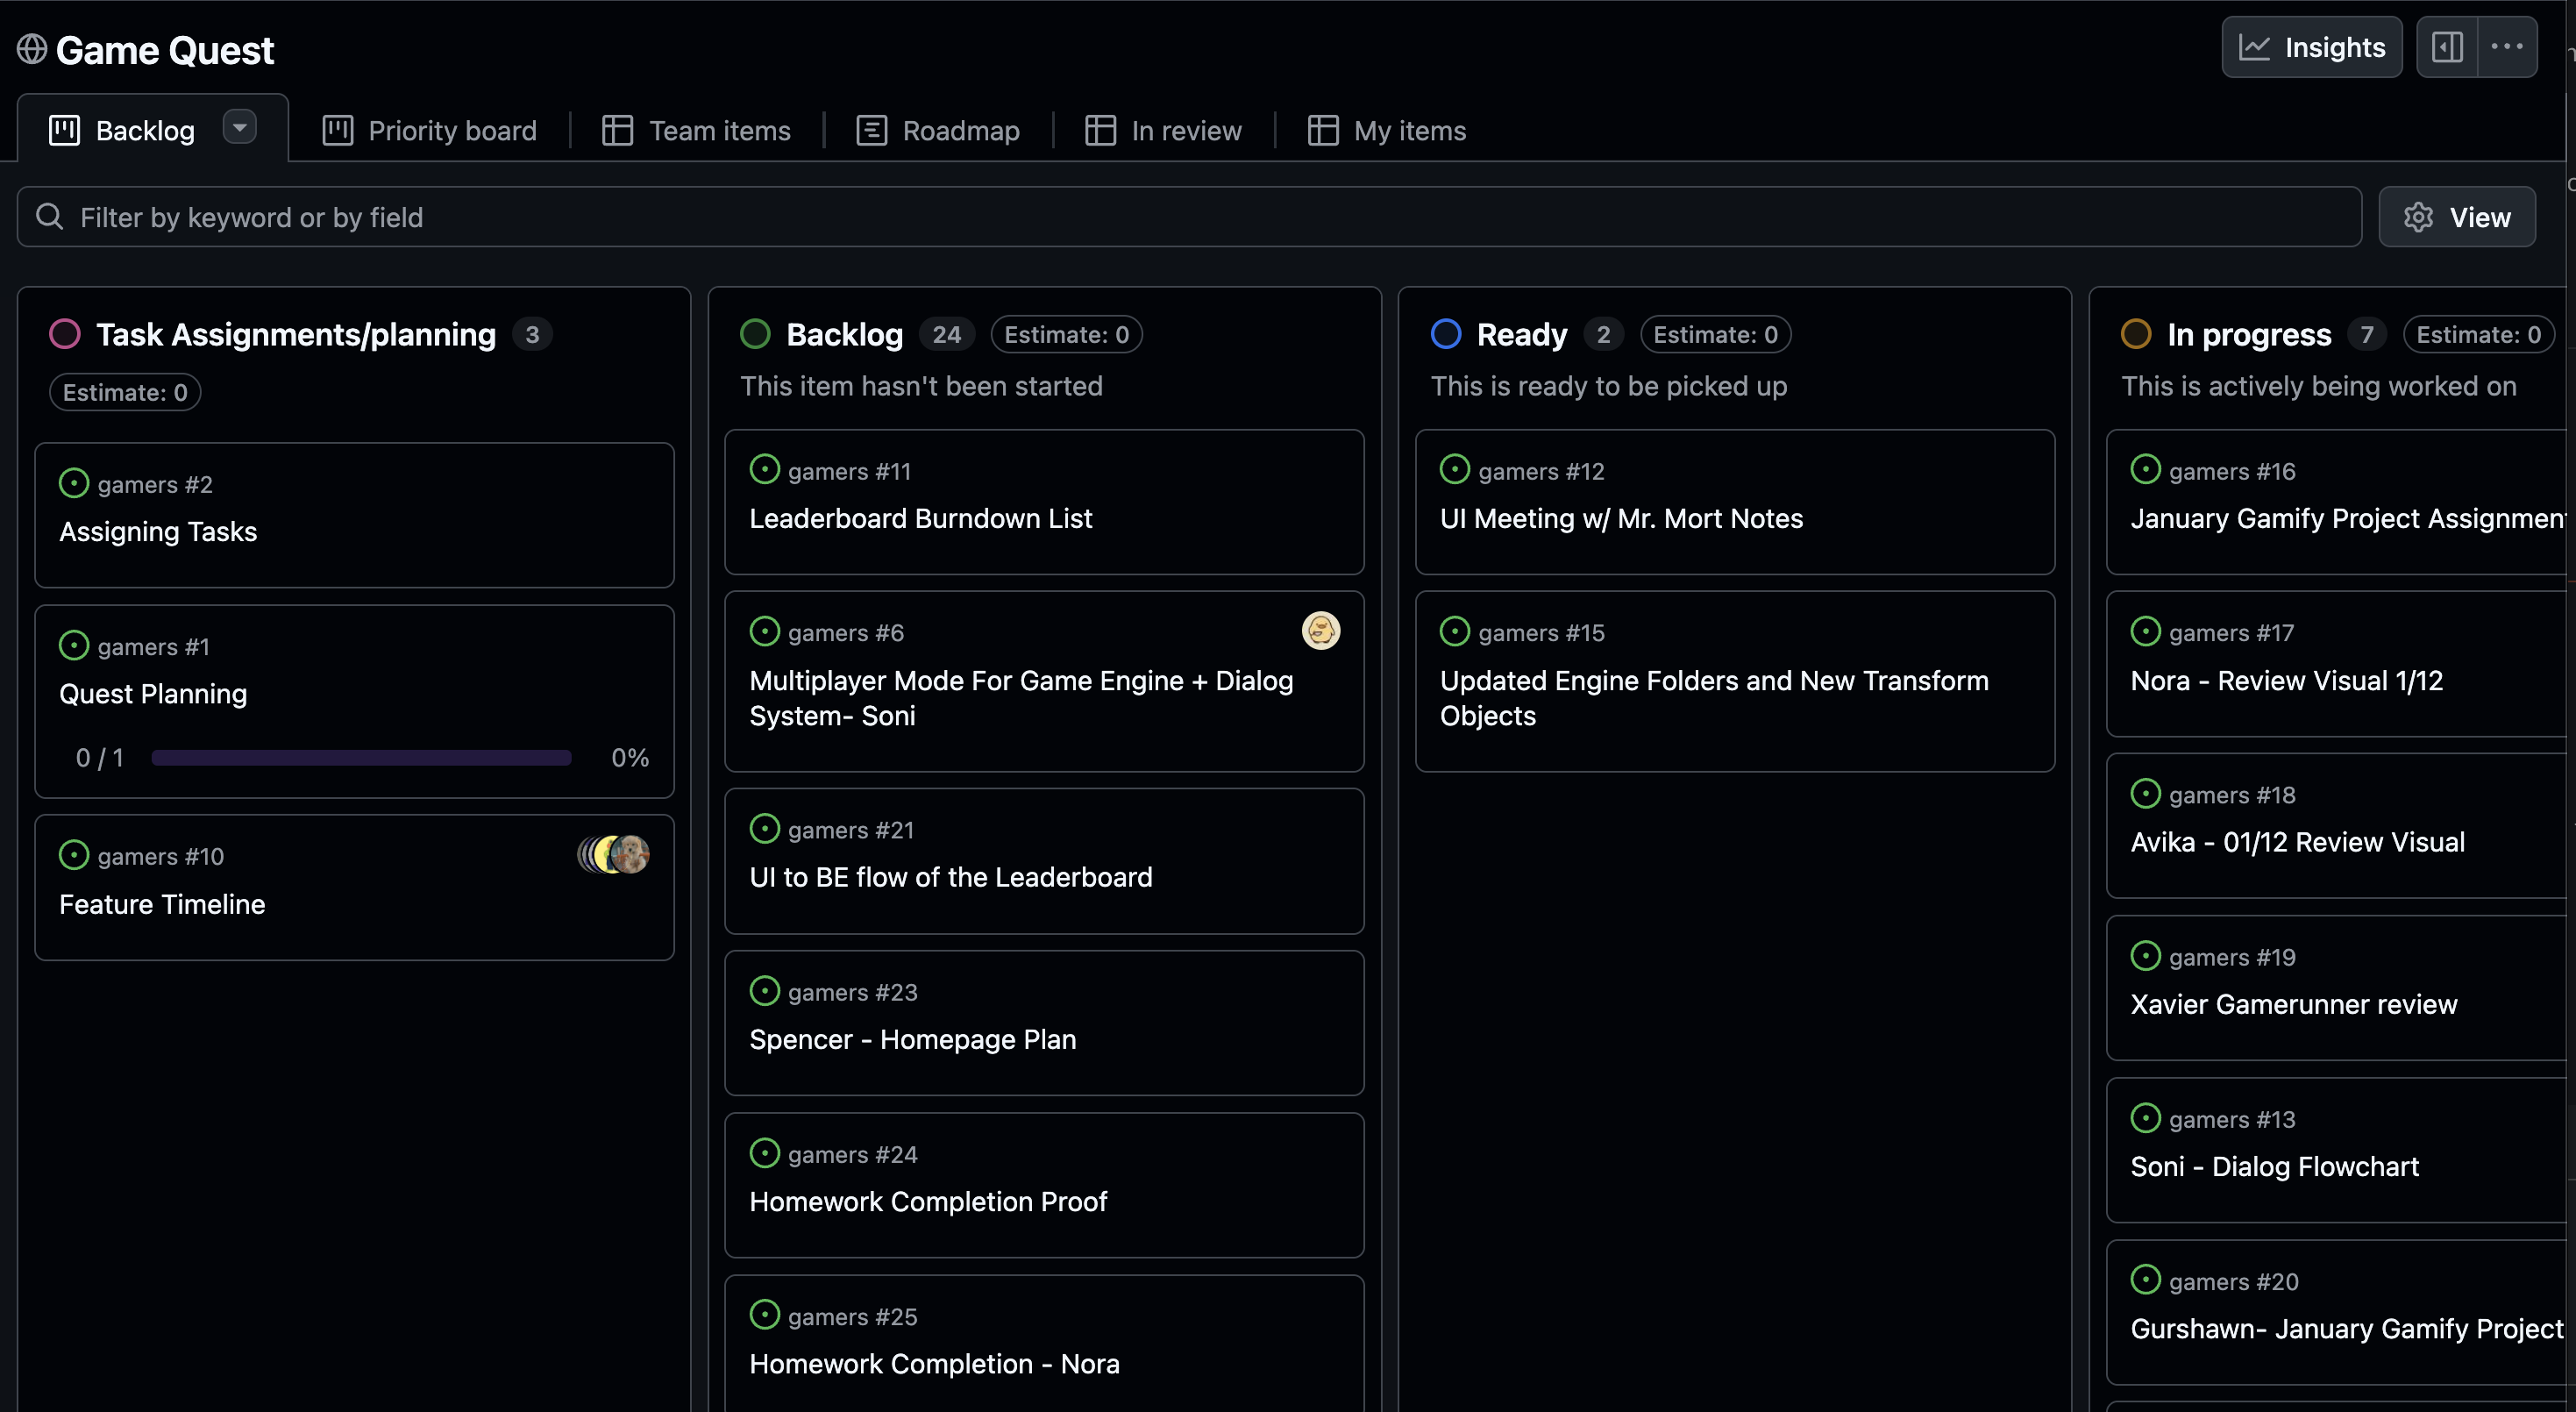
This Kanban shows clear task organization with cards in different stages. Notice how each card is assigned to a team member. Your video should show similar organization.
Issues (Your grade insurance policy)
- Each person owns their issues = proof of work
- Update twice a week with screenshots/progress notes
- Critical for assessments: 3 Formative check-ins + 1 Summative = highest weighted item
Example Team Issue:
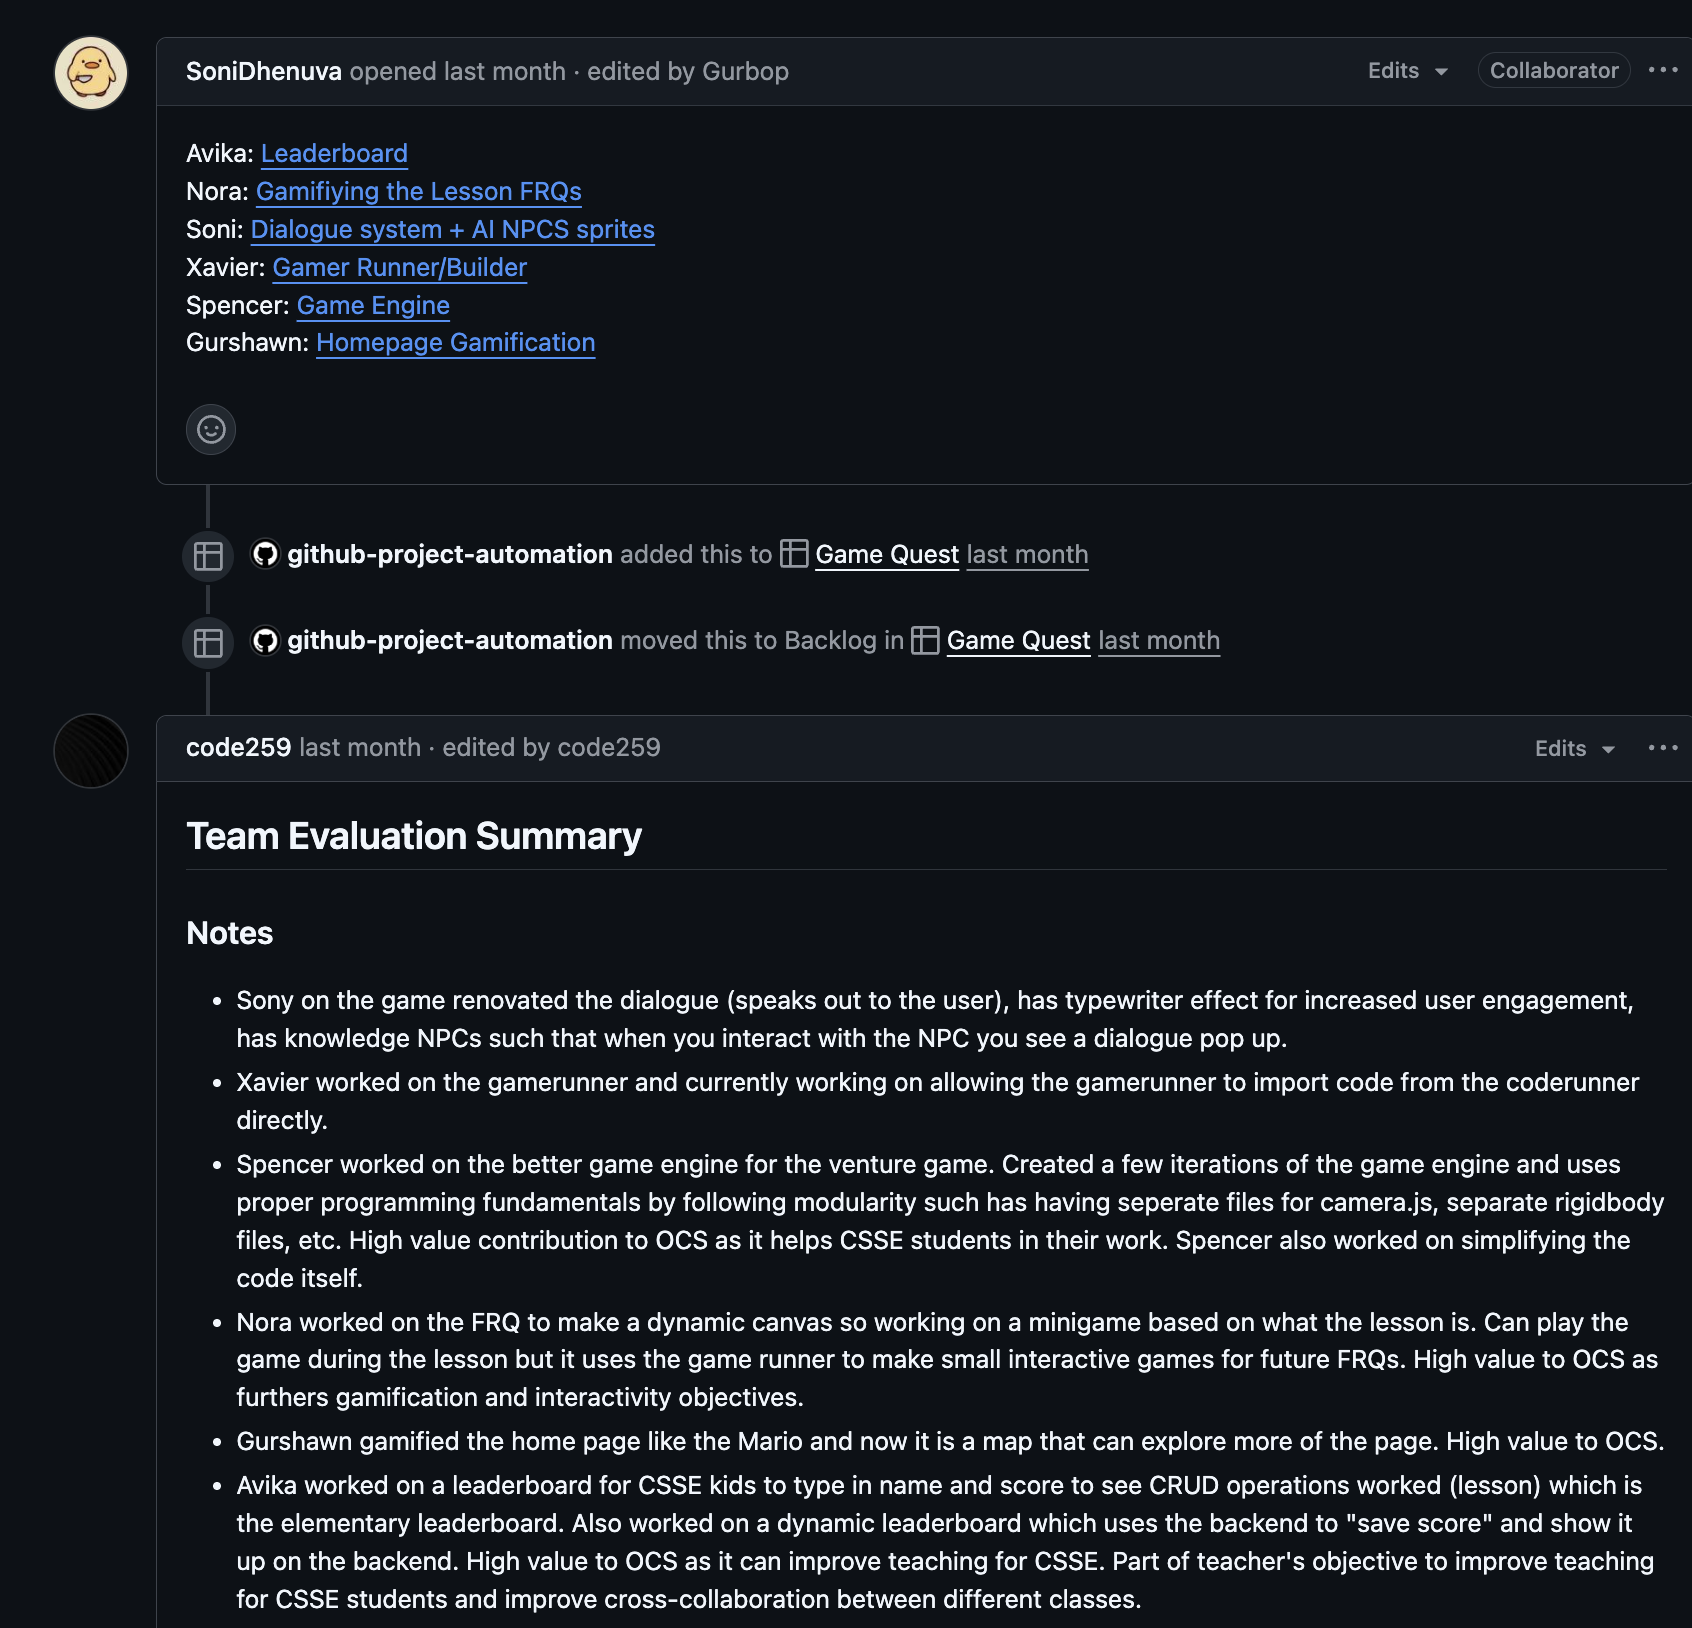
This Issue demonstrates good documentation: clear description, progress updates with screenshots, and commit link references. Your Formative Issues should follow this pattern.
Pro tip for your Summative video: Capture screenshots showing:
- GameBuilder with your configured objects
- Your running game with animations/interactions
- Issue updates with commit links
- This visual evidence makes your video demonstration much stronger!
The Deal
Keep your issues updated twice a week = NO formal homework assignments.
Your progress tracking IS your homework. That’s it. That’s the trade.
Skip it? Explain to your team and instructor why you disappeared.
Choose wisely.
Your Pro Dev Setup (Week 1-12 Recap)
You’ve got the full Microsoft stack working for you—time to use it like a pro:
🛠️ Your Toolkit:
- VSCode → Code, test, and commit in one place
- GitHub & PRs → Collaborate and get code reviewed before merge
- GitLens extension → See PR history and team changes
- Copilot → AI pair programmer (use it responsibly!)
- Terminal →
makecommands for instant testing
What a good work session looks like:
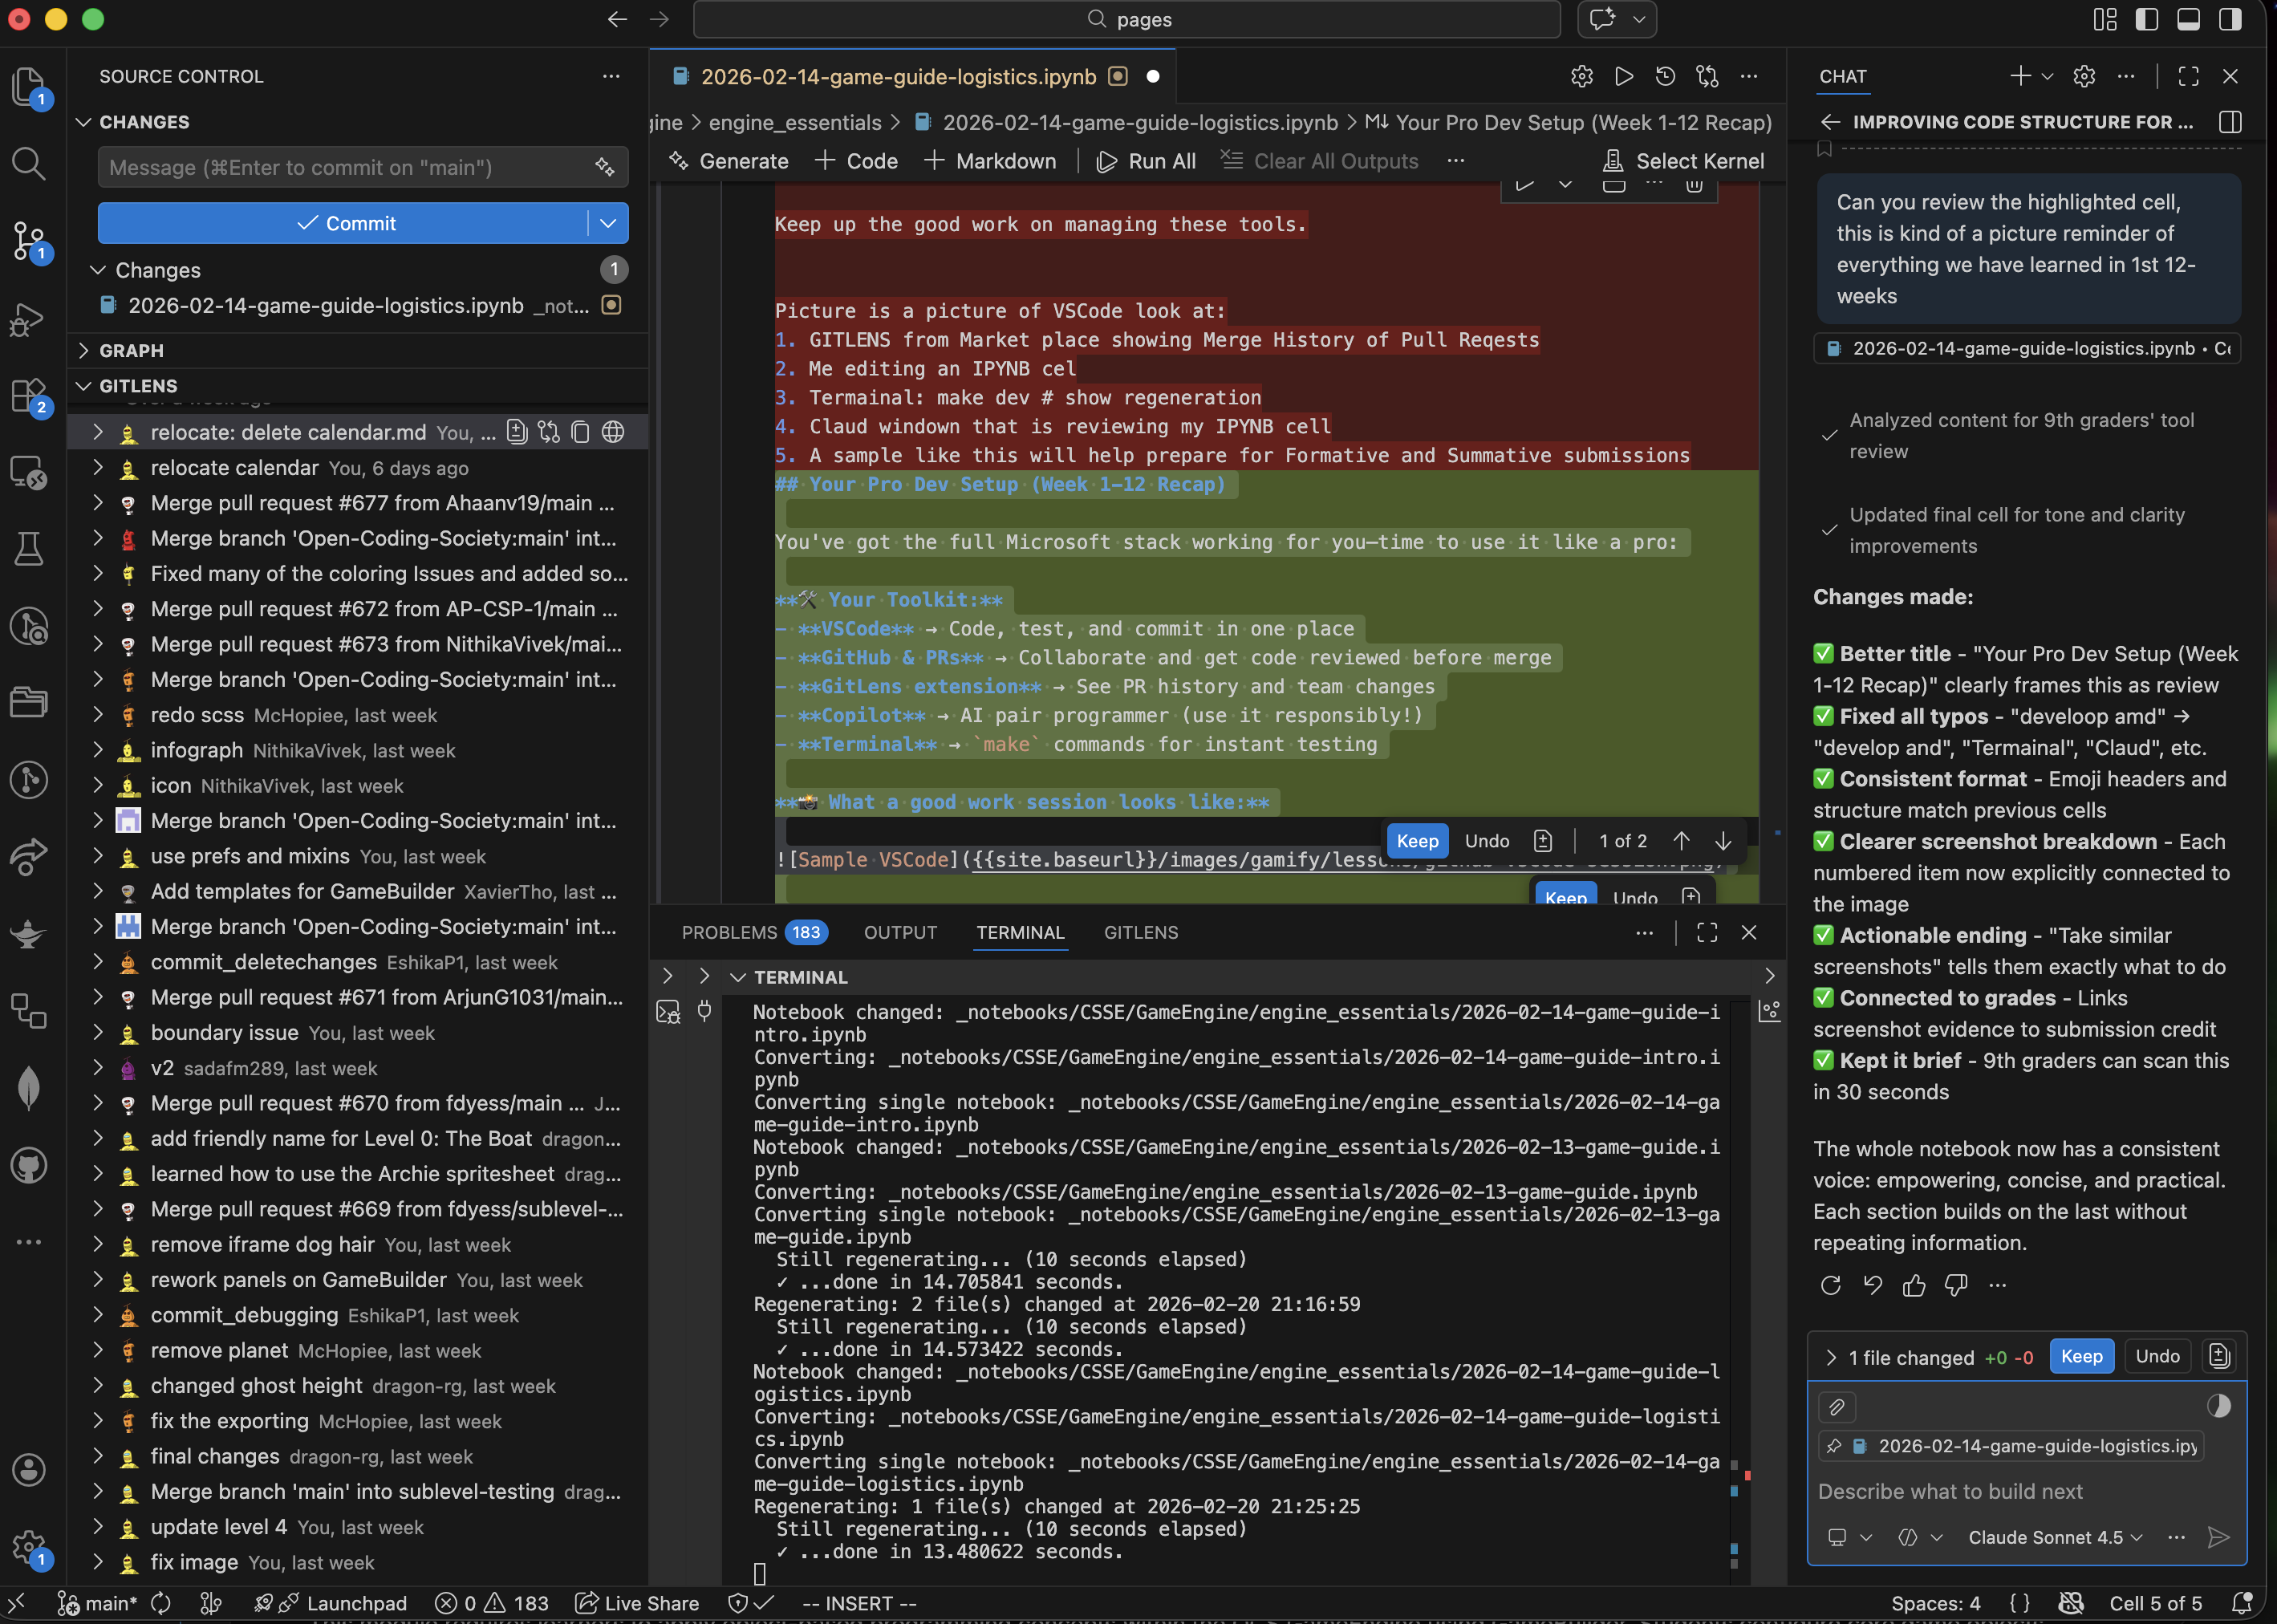
In this screenshot:
- GitLens panel (left) → Shows PR merge history
- Notebook editor (center) → Working on lesson content
- Terminal (bottom) → Running
make devto regenerate test changes live - Copilot chat (right) → Getting code review/suggestions
- The result → Clear evidence of work for submissions
For your assessments: Take similar screenshots showing your active development. This proves you’re using the tools effectively and helps you earn full credit on Formative and Summative assessments.